This guide is by no means a suitable workflow for every production, or the best option. It is simply a guide to help familiarise with Arri systems and setup options.
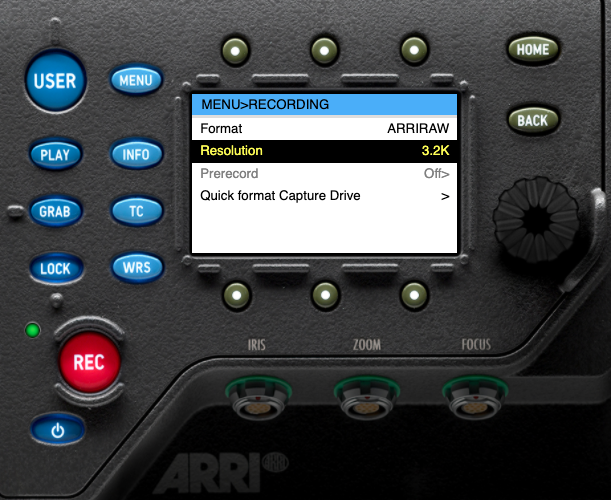
SET THE FORMAT AND RESOLUTION –
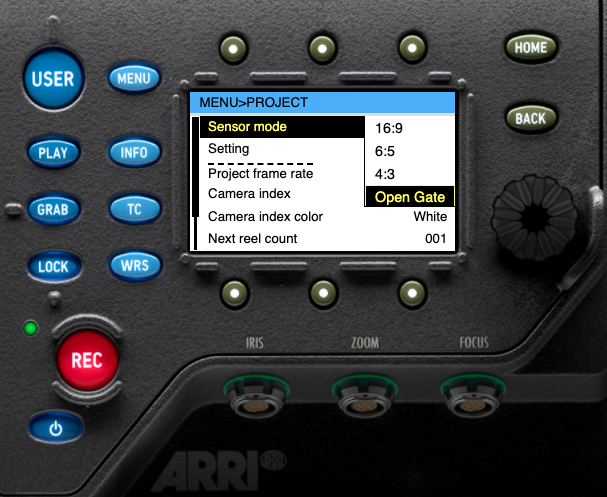
Menu > recording. The SXT offers 16:9 ARRI RAW 2K or 3.2K. ProRes 4444 HD, 2K Cine, 3.2K, 4K UHD and 4K Cine. All of which are also accessible in ProRes 4444 XQ and the 6:9 sensor mode for anamorphic shooting. To change the sensor mode, go to Menu>Project>Sensor mode.
Here, choosing ARRI RAW 3.2K OPEN GATE, the reason can be found later on in the workflow.
The difference between ARRIRAW, ProRes 4444 and ProRes XQ –
When RAW recording first emerged, many professionals stopped shooting with compressed formats. However, the technology of compressed codecs caught up. Today codecs like ProRes 4444 offer a simpler but effective alternative to RAW. Furthermore, Apple then introduced ProRes XQ, an improved version of ProRes 4444. In summary, RAW offers better colour reproduction and uses the full available sensor but takes up a huge amount of space. Whereas ProRes offers smaller sizes and maintains the flexibility of RAW. The imaging differences between RAW and ProRes are small, but the file sizes and price are not!
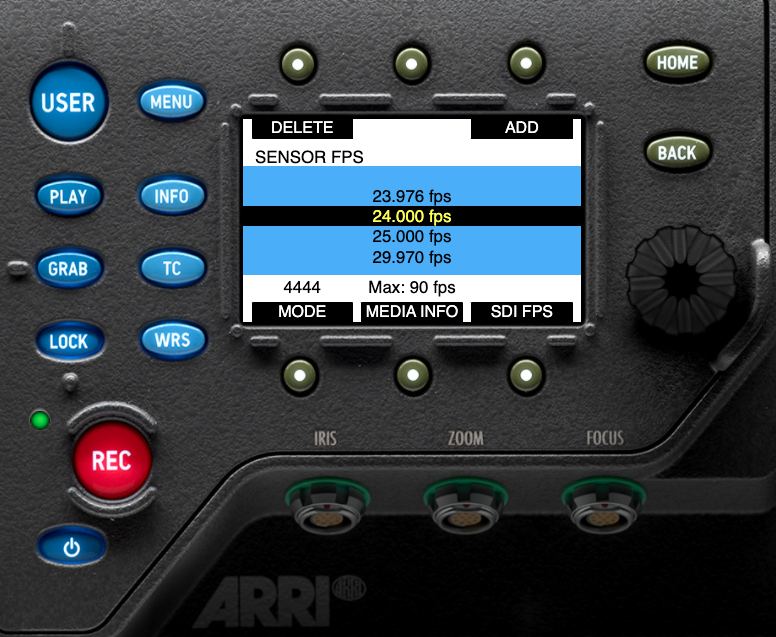
SET THE FRAME RATE –
On the camera’s operation panel, press the top left button to change the fps. By pressing ADD, you can make precise changes to the desired fps. It also tells you the max fps in the shooting mode set. In ProRes 4444 2K, you are able to shoot 120fps.
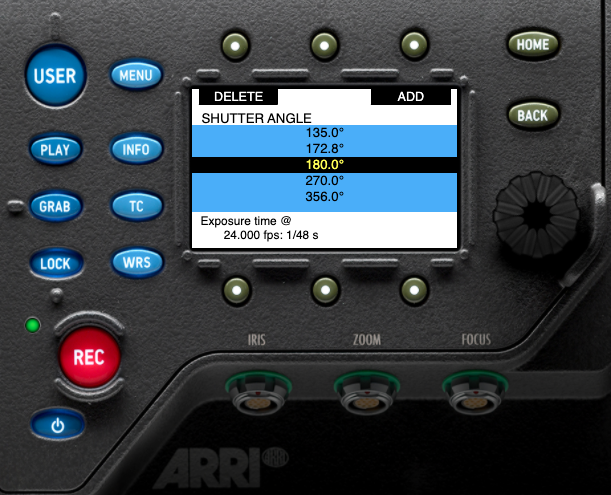
SET THE SHUTTER ANGLE –
On the camera’s operation panel, press the top right button. The most common shutter angle in cinema is 180°. At 24fps, a 180° angle equivalates to 1/48th of a second. Thus, double the frame rate. This is known as the 180° rule, the rule mimics motion in the closest way to what our eyes see in the real world. A higher shutter will constrict blur, creating a robotic feel. At a lower shutter, motion will be smeared.
When shooting screens, whether it be a phone, laptop or TV etc. A normal shutter angle may cause flickering; therefore, you would need to set it around 135.0°, equivalent to 1/64th of a second.
SET THE ISO –
On the camera’s operation panel, press the bottom left button to set the EI. For Arri, the native ISO is 800. At the native ISO, the camera doesn’t need to increase voltage to the sensor, which is when noise begins to appear. Judged by the manufacturers, at the native ISO, the camera will perform best in regard to noise to dynamic range ratio.
SET THE WHITE BALANCE -
On the camera’s operation panel, press the bottom right button. Here you can choose from white balance pre-sets ranging from 3200K to 7000K. Press ADD to dial a temperature in, with the option to increase and decrease green/magenta. Alternatively, press the bottom middle button for an auto white balance.

SET THE COLOUR PROFILE –
On the camera’s operation panel, press the bottom middle button. Set the REC processing to LOG C. LOG recording is a picture profile which preserves dynamic range and tonality (more about this to come!). Set all the EVF/MON processing to Look files. Then, underneath set the look file to ARRI 709, or load one via SD card. Finally, set the MON OUT colour spaces to Rec 709. Looking at a LUT allows an estimated look of what the graded image may look like.

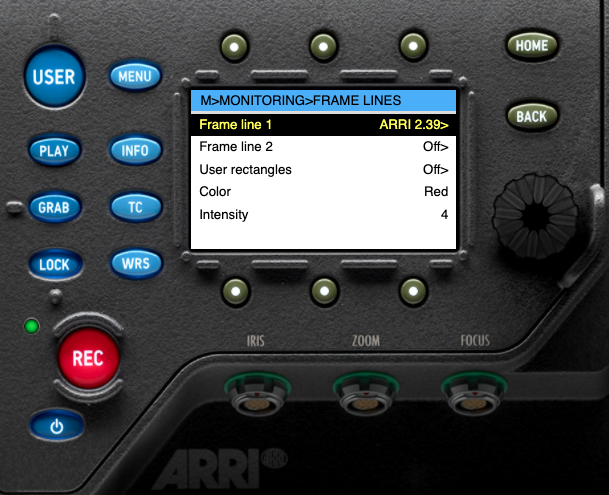
SET THE FRAME GUIDES –
Menu>monitoring>frame lines. Set frame line one to 2:39 with any preference to colour and intensity. Doing so wont record the aspect ratio, it is only a target.
By shooting ARRIRAW, 3.2K, OPEN GATE, it allows a recording of 3434x2202, a higher resolution that shooting 16:9 ARRIRAW. Shooting open gate for an end aspect ratio of 2:39:1, gives a final 3424×1712 resolution with the bonus of having a wider field of view. Frame guides vary on the final delivery of the project.
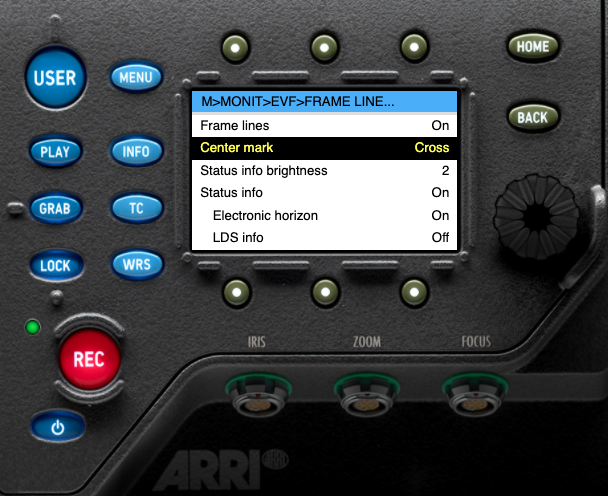
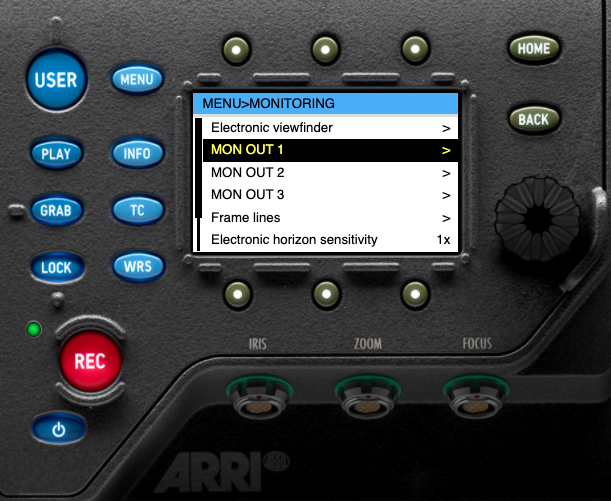
SET UP THE EVF (ELECTRONIC VIEW FINDER) AND MONITORS -
Menu>monitoring>EVF. Under frame lines + status info, turn on frame lines, centre cross, status info and electronic horizon. Go back, turn on surround view if you want to see the outer edges of the image that aren’t recording, to see when something is about to be in frame.
Back under Menu>monitoring. Set up MON 1, MON 2 and MON 3. This greatly depends on the team. You will most likely want to turn frame guides on for all, peaking on for the focus puller, false colour and surround view for the script supervisor. You may want to turn status info off for the director on MON 3.
Also, within monitoring is the false colour index, print this out and stick it to the side of the camera for easy access!
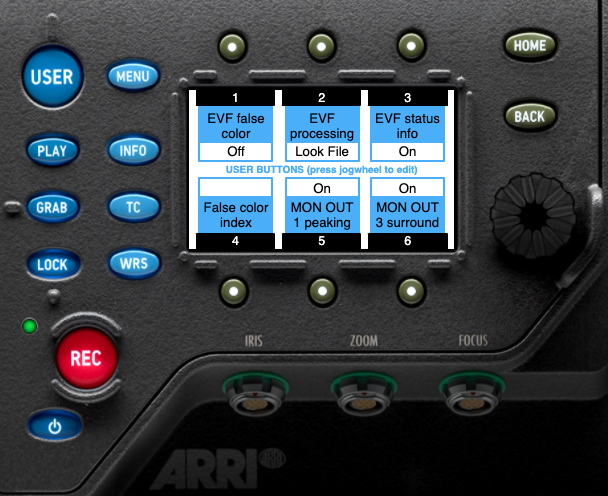
PROGRAM THE USER BUTTONS –
Press the USER button on the camera and press the jog wheel to program the six customisable buttons. Again, completely depends on the team. An example would be:
- Button 1 – EVF False Colour
- Button 2 – EVF Processing (To see a log image)
- Button 3 – EVF Status info (Toggle to see a clean image)
- Button 4 – False colour index
- Button 5 – MON 1 Peaking
- Button 6 – MON 3 Surround (For director to see edges)
SET PRODUCTION INFO –
Menu>project>production info. Here you can set necessary information production require. Such as the cinematographer, operator, scene and take.
