Disclaimer – This is by no means the perfect product shot setup, nor is it the best method of doing so. It simply demonstrates the possibilities of what you can achieve on a small budget.
2020 saw the world staying safe indoors, which meant getting creative from the comfort of your own living room. Whether you’re an enthusiastic photographer, brand owner or simply enjoy shooting fun photos of products, product photography doesn’t have to be compromised through not having access to a studio, complicated setups or expensive equipment. With some basic techniques and a good understanding of lighting and composition, it is possible to take incredible looking images on a micro budget.
For this setup, you will need the following:
- A blacked-out room
- Table
- White or black sweep backdrop with stand
- Bounce card or white reflector
- Black wrap or black foil
- Tape
- Croc clips
- One small RBG light
- One soft or diffused key light
- Tripod
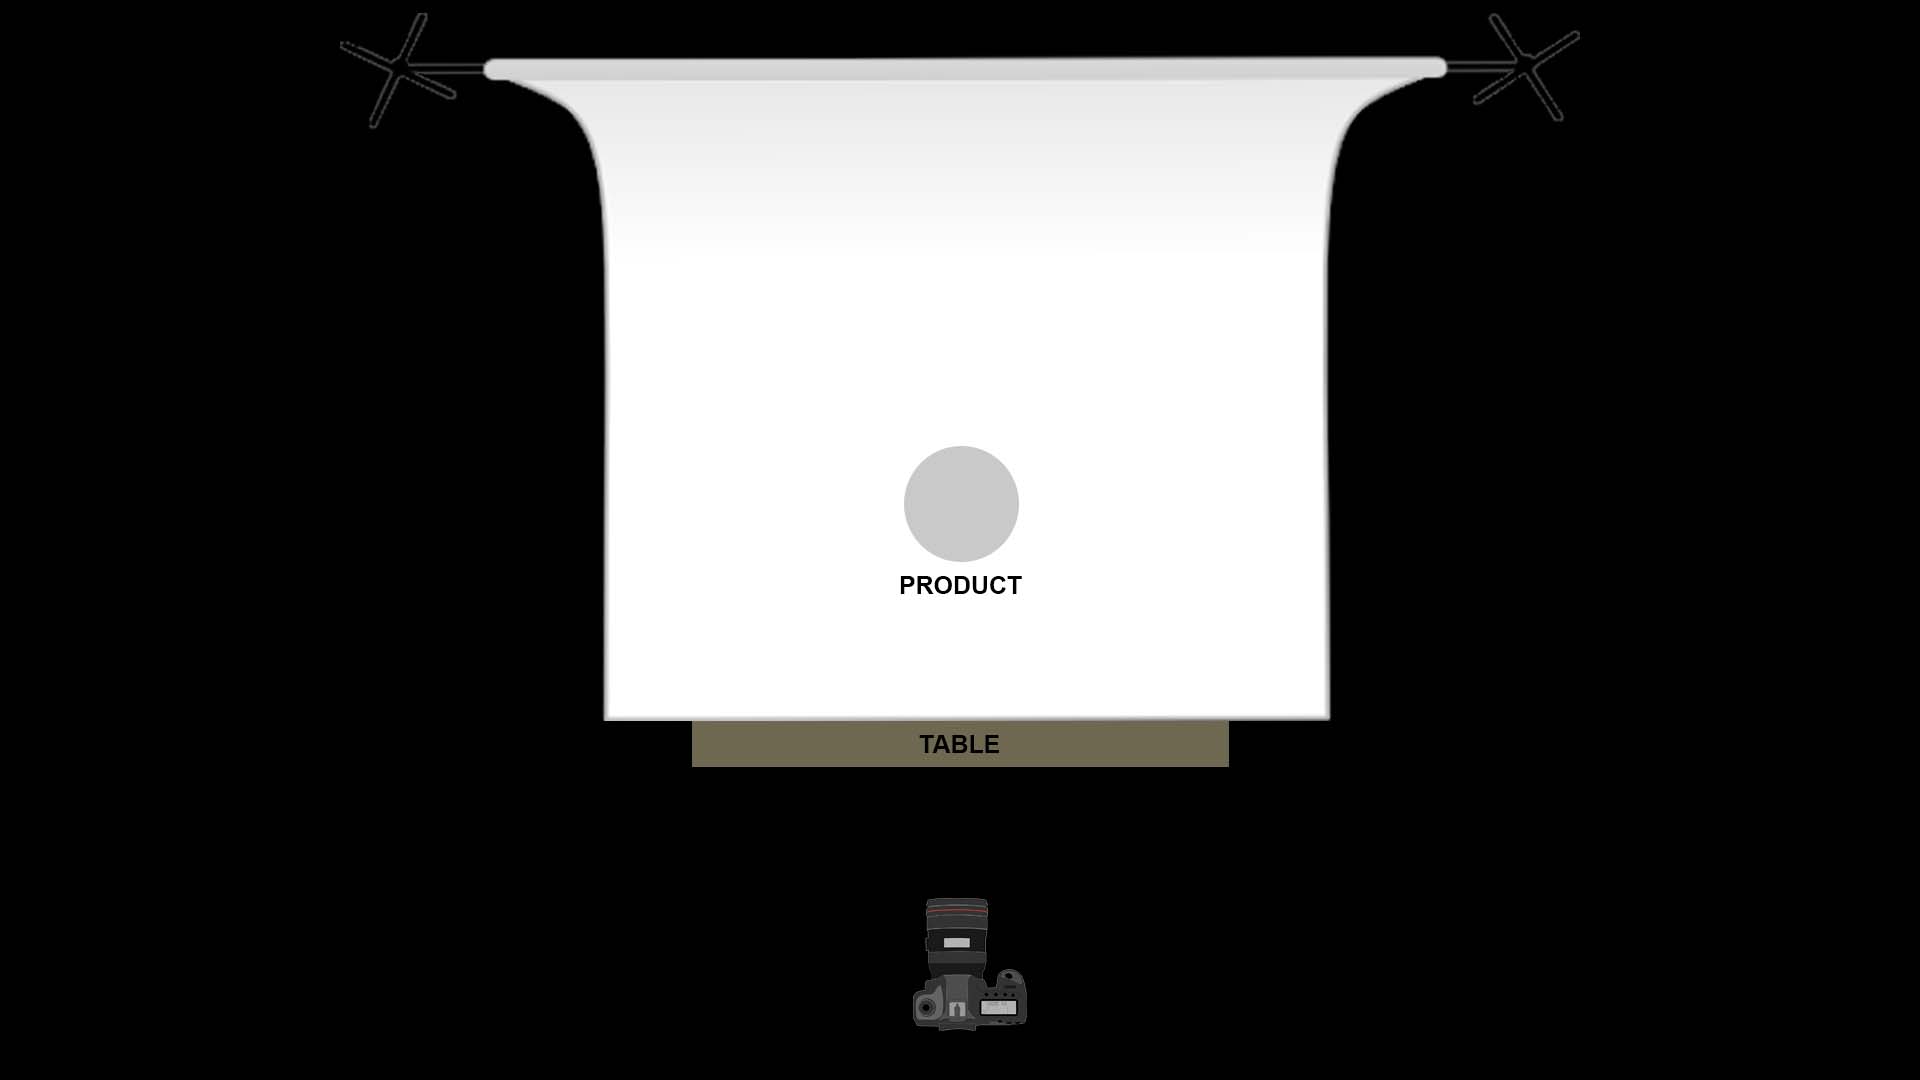
To begin, situate yourself in a dark room. Unless you are using strobe lighting, which will overpower any ambient lighting, when shooting continuous light, it is vital to block out any ambient light spilling in from doorways or windows. Then position a table with adequate working room around it.
Take your backdrop and position it so it sweeps over the table, croc clip it to the sides of the table to ensure it doesn’t move. In this example, a PVC black backdrop was used, and a simple T shape stand. You could also add a reflective surface beneath the product, to create a sleek floating effect. The backdrop is completely down to preference and what compliments the product. Alternatively, you can use a TV with a colour block displaying, which also conveniently doubles up as a subtle backlight.
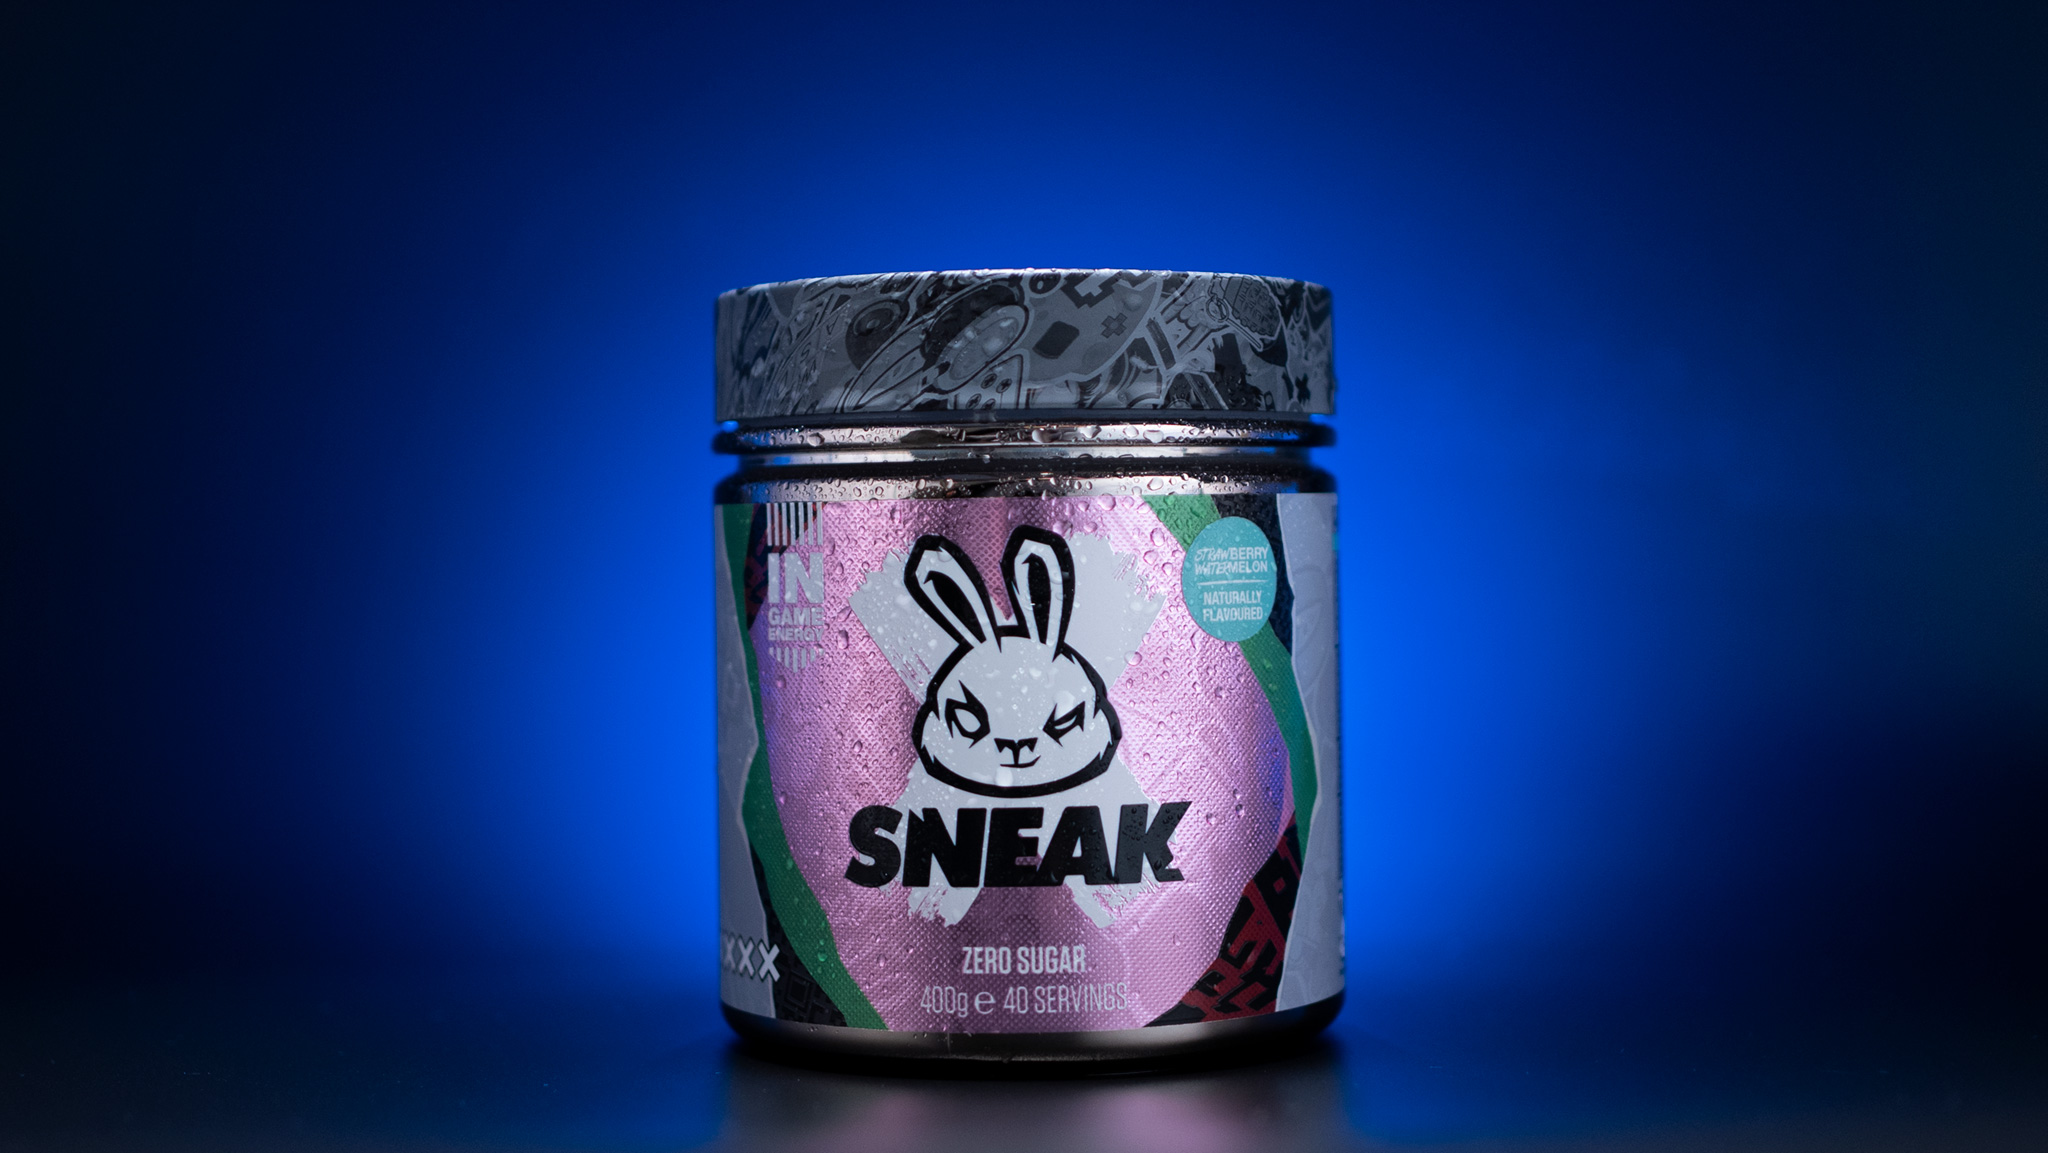
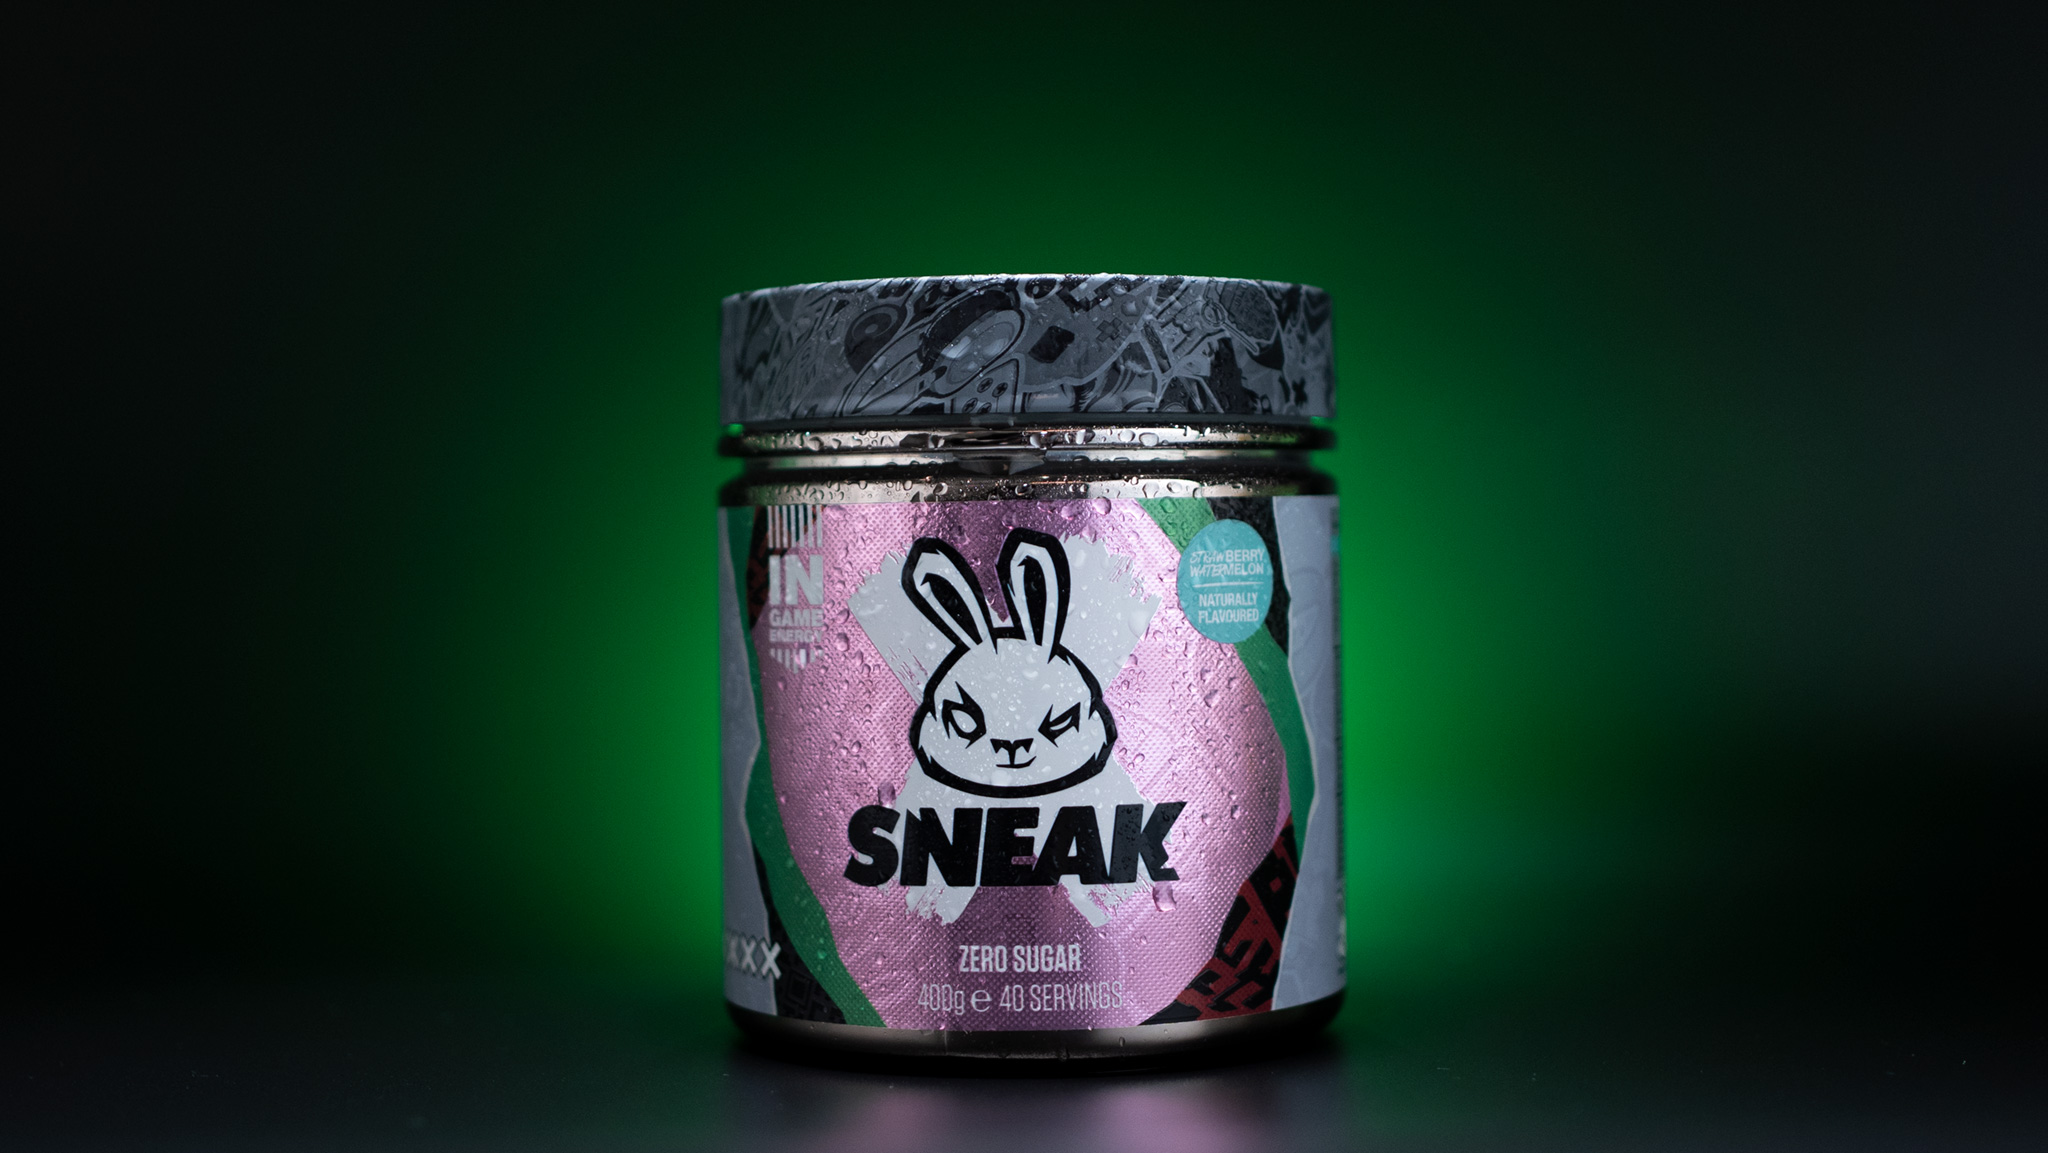
Now position the product in the way which works best for you. In this example, it was a tub of Sneak sugar free energy drink powder, positioned centre in the frame. Additionally, the tub was sprayed with water for added texture and detail, as well as to enhance the pure refreshment you get when consuming the product after a hefty workout.
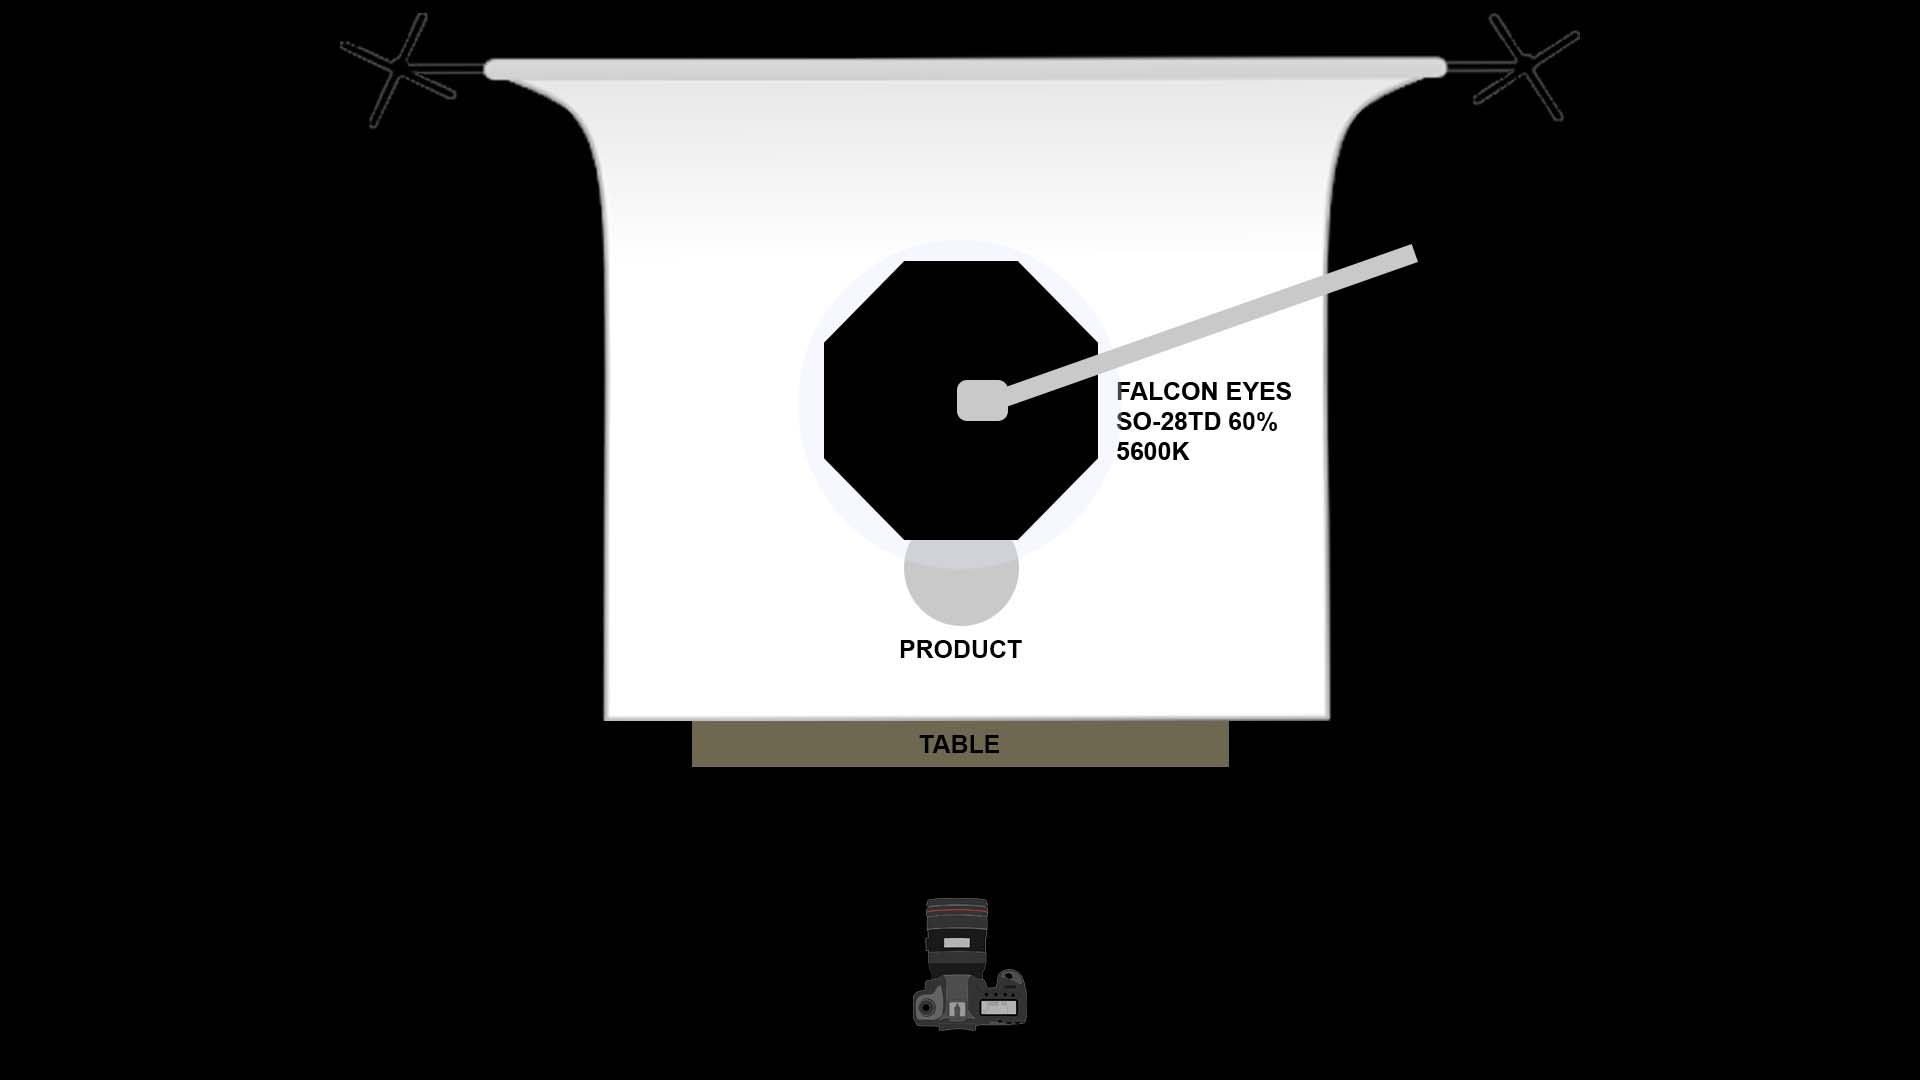
With all the practical elements in position, you then need to light the shot. In this example, the setup used is known as top lighting. A method used for all kinds of situations, from low budget product shots to high end car commercials.
You want the light to be as soft as possible, this can be achieved by using a large soft box or if using a small light, you can stack layers of diffusion to make the source larger. The bigger the source is, the softer the light will be. Additionally, you also want the light to be as close as possible. In this example, the Falcon Eyes SO-28TD soft light was used, a circular bi-colour LED with built in diffusion. A great budget friendly light, it is cheaper than most and you don’t need to buy additional modifiers to soften it. The light was attached to a boom arm and position directly overhead at 5600K. If, like in this example, your main light source isn’t the softest or if your backdrop is somewhat reflective, you may get some hot spots. To resolve this, you can use a flag or black wrap to cut the light off the backdrop.
Additionally, depending on the look you are trying to achieve, you can add a backlight. In this example, the premise was to make the funky design of the product pop and bring it away from the simple black backdrop. The Aputure MC was placed directly behind the tub and set to a low intensity. Alternatively, you can use any cheap pocket sized RBG light, such as the Weeylite RB08P
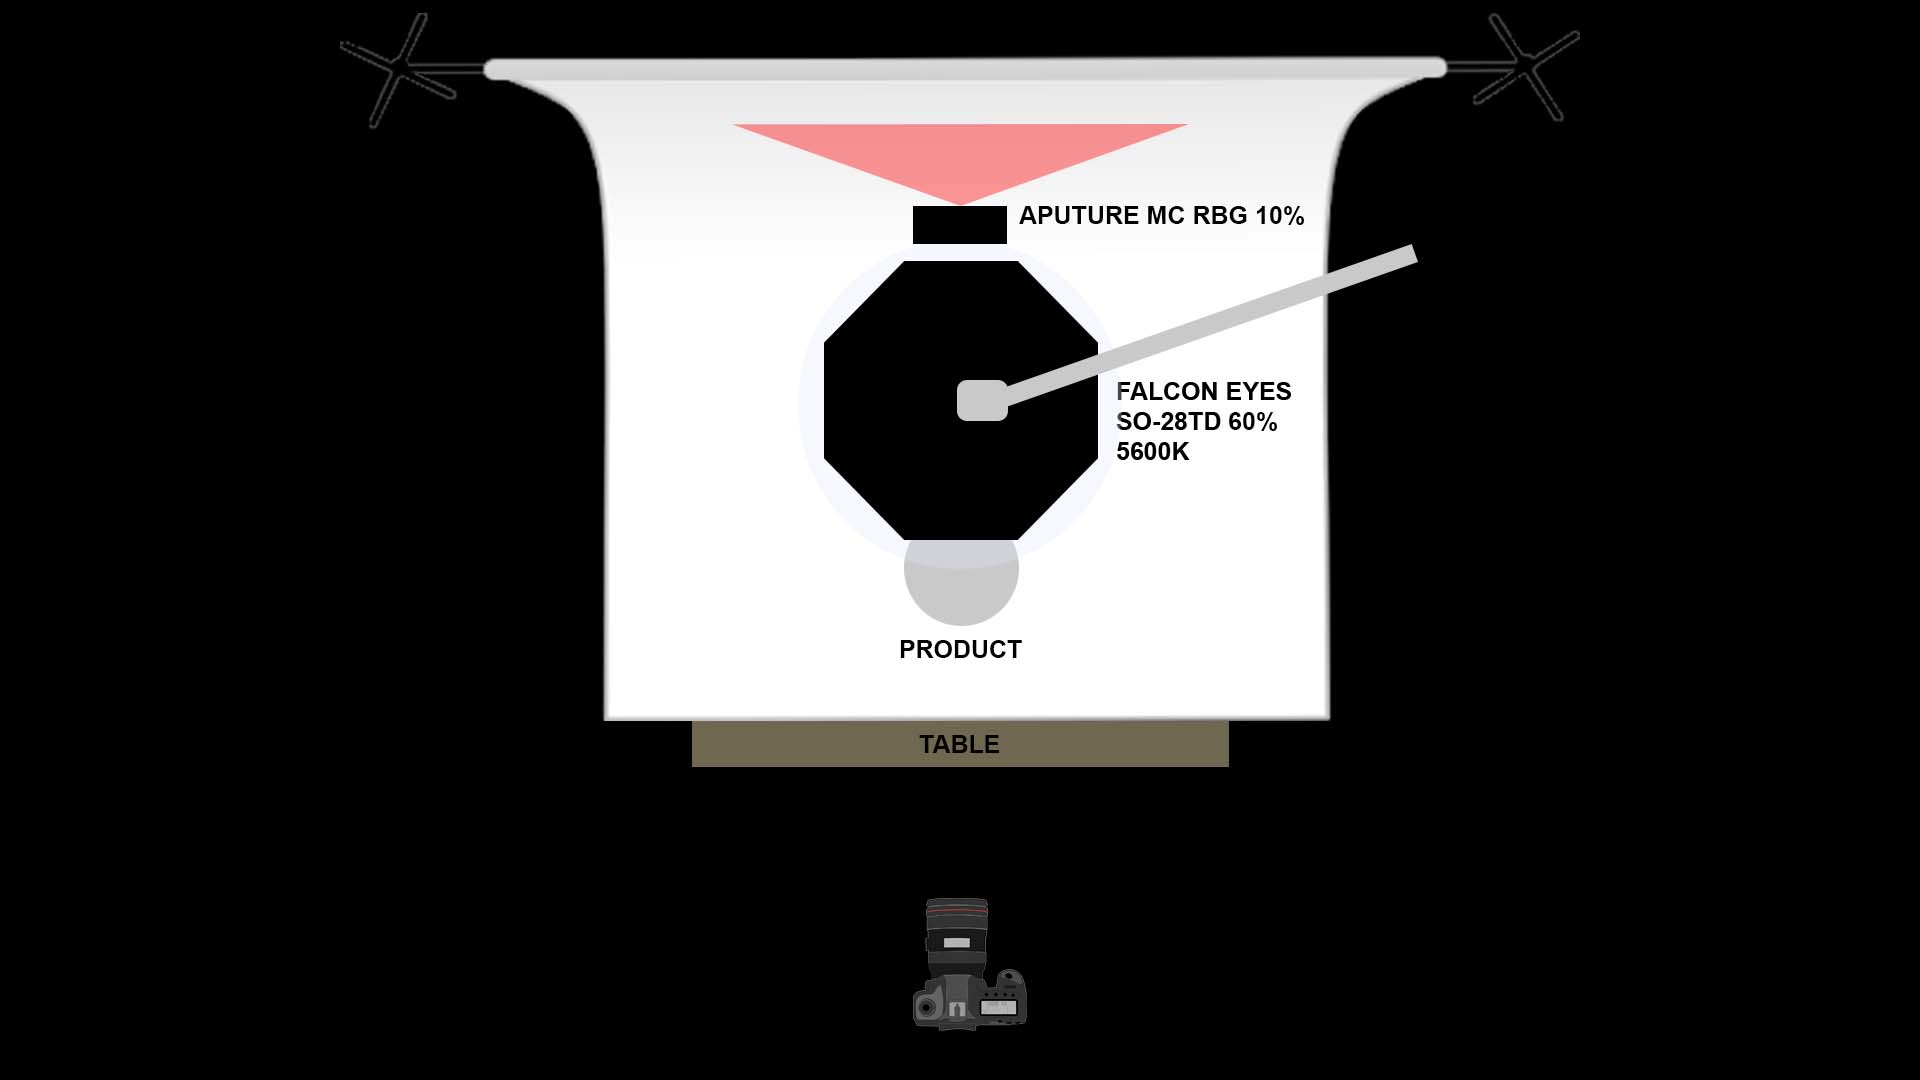
Finally, in this example, a large white reflector was used to the left of camera, to bounce additional light back in and to improve overall exposure.
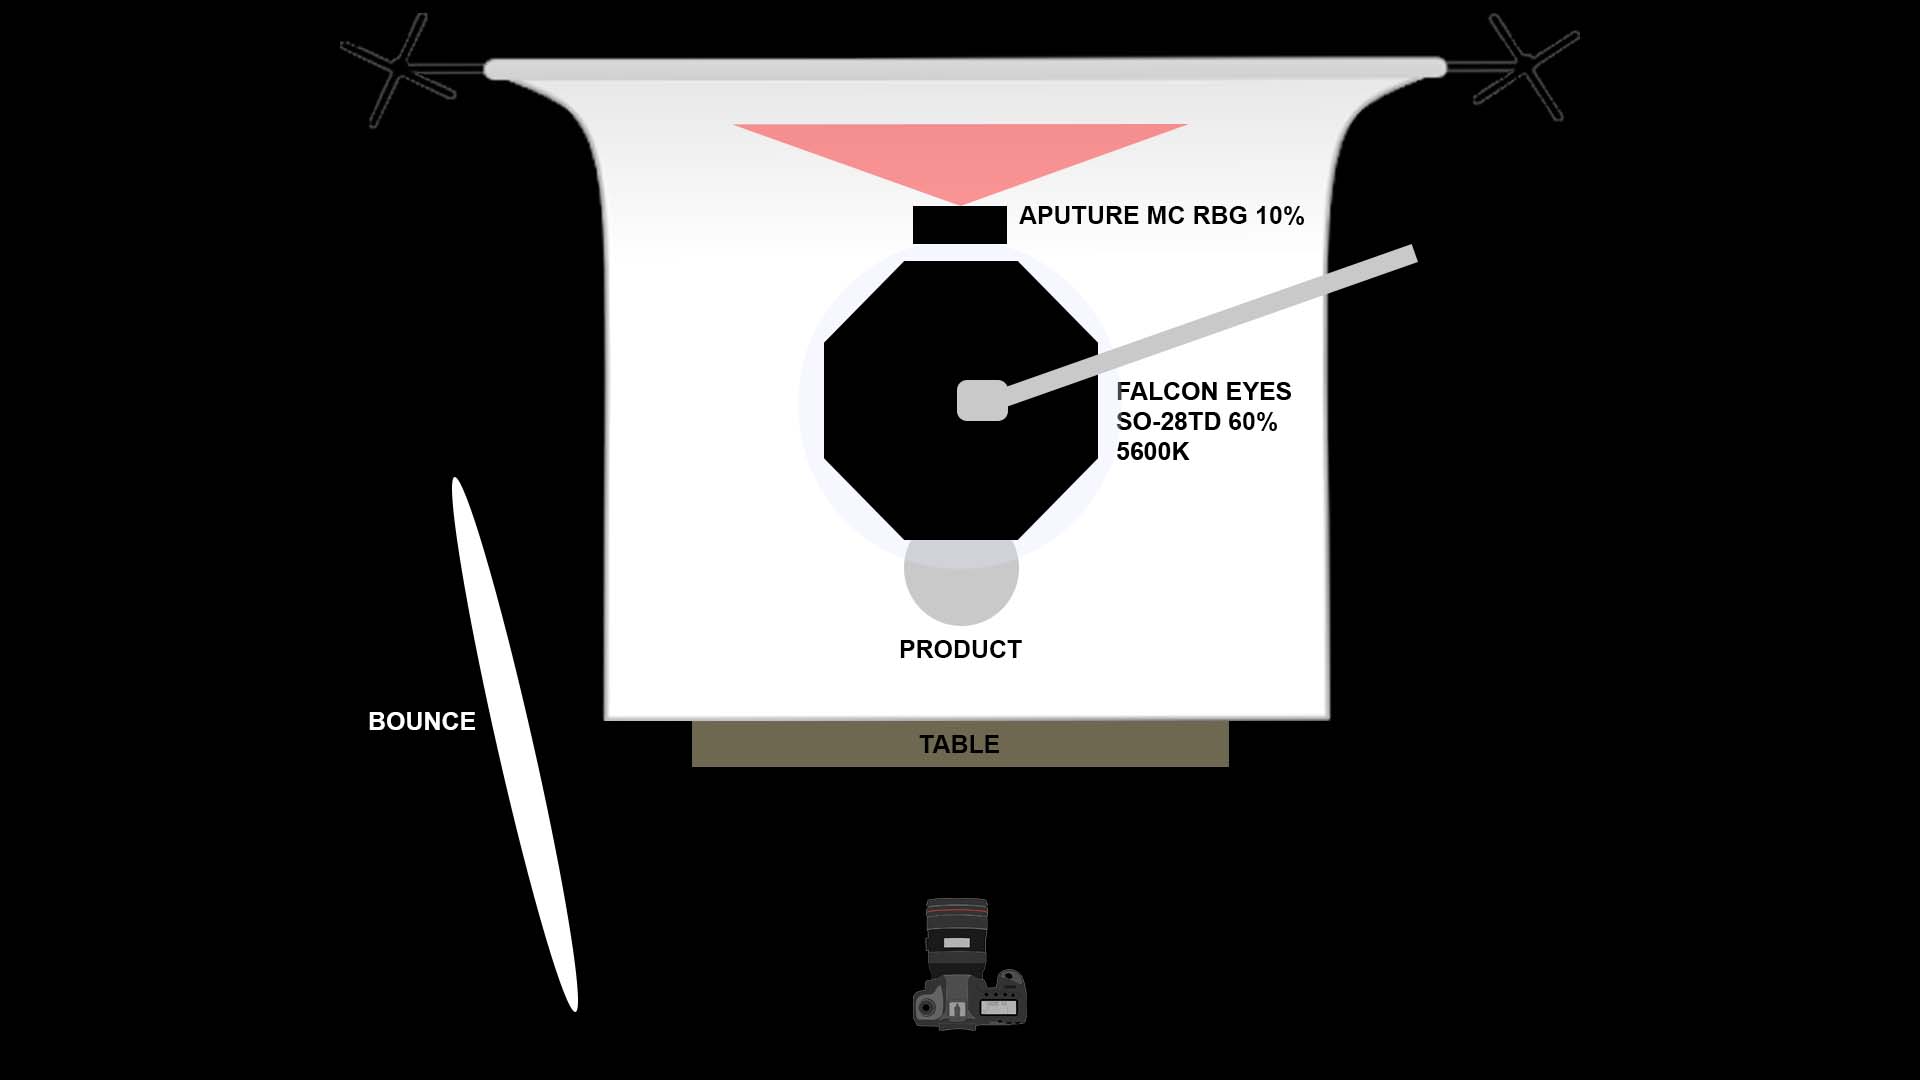
Once satisfied with the lighting, setup your camera on a tripod and frame the shot. In this example, it was the Sony A7III with a 35mm 1.8mm. It is highly recommendable to shoot using a tripod in order to level the shot and reduce camera movement. To reduce further micro shakes, shoot on self-timer mode to improve image quality and keep the image sharp.
Overall, this is by no means the perfect product shot setup. However, it demonstrates being adaptable to the resources you have available, to achieve the desired look. At foremost, it is about trial and error. It may take fifty attempts to DIY the right rig, but it is always possible to achieve a great looking image without a bulk of expensive equipment.
CINE.TO is a participant in the Amazon Services LLC Associates Program, I may earn a small commission for my endorsement, recommendation, testimonial, and/or link to any products or services from this website. Your purchase helps support my work in bringing you real information and tips about everything cinematography and photography related.